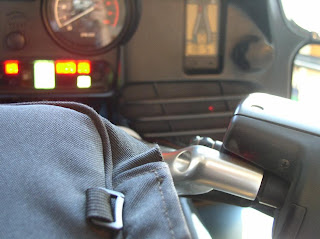
So here I am without a voltmeter to see if my battery is charging with all my electric farkles drawing upon the battery's potential. I know, most people get along fine without a voltmeter on their motorcycle but I guess I am more paranoid.
I stopped by a couple of auto parts store and found this on the second one:

It's made by "Conduct Tite", model 84502, see this link if you want one.
I cut off the probe and the alligator clip, hard-wired it to the switched power wires I had used for the old voltmeter. I took the right-side fairing off to make a cleaner job of installing it and it came out quite nice. Since it's just a series of dummy lights indicating battery charge level, I thought to just hide it behind the radio speaker grill on the bike. (I don't have the oem radio and speakers.) It really came out nice and it's quite visible as you can see.
 You only see one red light when you switch on the ignition but engine not on
I should have written down the voltage levels indicated by the lights but suffice to say, green is what you want to see. Yellow and red by themselves, and the motorcycle running, not good, you're draining the battery and the alternator is not charging it either because you've overwhelmed it with electric demands or somethings wrong with the alternator like a broken belt perhaps.
While I had the right-side fairing off, I decided to see how difficult it is to remove the alternator belt cover at the front of the engine. Turns out to be pretty easy with just one of the four securing bolts being a PITA to remove. I also had to remove the mounting hardware for the right-side "shark fin" in order to ease the cover off the motorcycle. The belt looked to be in fine shape at 33k so I not only felt better about going on a long trip with it while carrying a spare but am also pretty confident I can do a field replacement if I need to do so.
As you can see, the belt looks to be in pretty good shape so I left it alone since I do have the spare belt with me for the trip. This little bit of PMCS, (an Army acronym for: preventive maintenance checks and services) boosted my confidence re the alternator belt, so it was worth doing.
Now all that's left is to sort out the stuff to be packed for the trip. I have to work this weekend but will get it all stowed by Sunday evening.
While I had the right-side fairing off, I decided to see how difficult it is to remove the alternator belt cover at the front of the engine. Turns out to be pretty easy with just one of the four securing bolts being a PITA to remove. I also had to remove the mounting hardware for the right-side "shark fin" in order to ease the cover off the motorcycle. The belt looked to be in fine shape at 33k so I not only felt better about going on a long trip with it while carrying a spare but am also pretty confident I can do a field replacement if I need to do so.
Now all that's left is to sort out the stuff to be packed for the trip. I have to work this weekend but will get it all stowed by Sunday evening.


No comments:
Post a Comment