Should have kept my mouth shut and not incurred the wrath of the gods of things mechanical....
Yesterday, Thursday, May 12
I'd just taken Thing One to work with the Sammy and had returned home noting that the engine seemed to be overheating a bit.
Once I got out of the car, it was obvious why. There was a noticeable amount of coolant coming out of the water pump area, to include the weep hole. I believe this means that the seal keeping coolant out of the front part of the pump had failed at the very least! Dammit.
I'd been, for quite a while now, been carrying a new spare water pump. I forget to original reason I bought it as a spare, but now was happy to have it on hand. Not too expensive, somewhere around $50 I dimly recall.
So there it was, 3:30 PM in the afternoon and I started tearing things down to get at the failed water pump.
As expected, its quite the PITA to get a 10 mm wrench on the four nuts holding the fan onto the fan pulley though its removal along with the radiator shroud is pretty much straightforward with some careful positioning.
The shroud and fan out of the way, there was room to get at the crankshaft pulley. But first, had to loosen the bolts (upper and lower) on the alternator in order to lever it closer to the crankshaft and lessen the tension on the fan belt. (As the fan is off, just pull the fan pulley off once you've loosened tension, the fan belt comes off easy after that)
Fan pulley removed, along with the fan belt, I tried for a quite a while to loosen the big nut on the front of the crankshaft. Turns out, you don't have to do this! After consulting both MikeW and RichardM, my "go to gurus" on things mechanical, I decided to also consult the Factory Service Manual. (duh....)
So, luckily unsuccessful in loosening the crank timing belt pulley bolt, I removed just the 4 crankshaft pulley bolts and off came the pulley!
Now that the crankshaft pulley was out of the way, I was able to remove the bolts securing the timing cover:
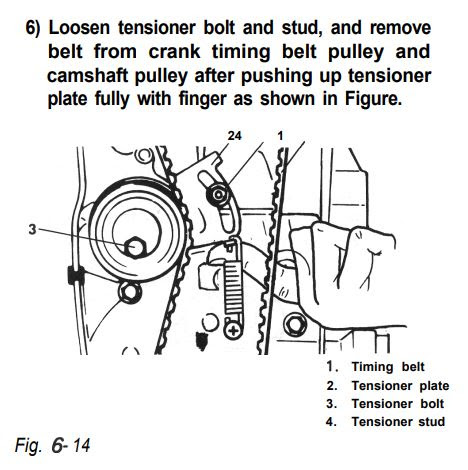
In order to remove the timing belt, you have to loosen the following:
not quite correctly labeled, is it?
It took a bit of fiddling about, but finally loosened the tensioner wheel enough to allow me to slip off the timing belt. NOTE: At MikeW's strong advice, I marked the top and bottom of the timing belt at both gears so that when the belt went back on, it'd be in the exact same spots! This is important otherwise you'll throw off the engine timing! Also, ensure no movement of either the crankshaft or the upper timing gear!
Below pic is for record, note the two springs on the tensioner plate. One turned out to not do much of anything but resided within the shorter, more robust spring. Weird.
Timing belt out of the way, I could now access the bolts/nuts securing the failed water pump and off it came:
In case you've ever wondered what a mechanical
water pump looks like on the inside
Spent quite a bit of time at this point cleaning things up, not only for the new water pump's mating surfaces but the area concealed by the timing cover. There was a lot of crud!
Finally, I used a light coat of Yamabond 4 gasket sealant to secure the new gasket for the new water pump into place and gently installed it onto the two mounting bolts protruding from the engine case. Next came the remaining bolts, trying to not tighten too tight and in a pattern to distribute the contact evenly.
New water pump in place, it was time to reinstall the tensioner wheel and bracket. This proved to be quite the PITA. After much trying (couldn't get the belt onto the tensioner wheel due to tightness of belt) I was able to finally slip the belt on by even more loosening of the bolt holding the tensioner wheel!
A view of the new water pump, with old studs installed using the double-nut method and some blue Locktite, before the timing cover was put back on:
Side view, showing the weep hole on
the new water pump.
Another for record pic, to show the one spring that I used on the tensioner plate, the other one not seemingly usable.
The rest of the steps were basically in reverse order of how they came off. Timing Cover, Crankshaft pulley, fan belt and water pump pulley, fan loosely hanging on the four bolts, radiator shroud, then secure mounting of the fan using the four nuts and some Loctite again.
Applied tension on the alternator again and went for a test drive after adding what I thought was what coolant had been lost by the old water pump. This turned out to be lacking, the engine quickly heated up and stayed close to the MAX mark till I got her home.
Once I was able to, I added what turned out to be almost 1/2 gallon + of new coolant directly into the radiator. Another test drive showed things working as expected, with the temperature gauge climbing to the 3/4 mark and then dropping to the middle where it remained for the duration of the 15 mile test drive.
This morning, Friday the 13th:
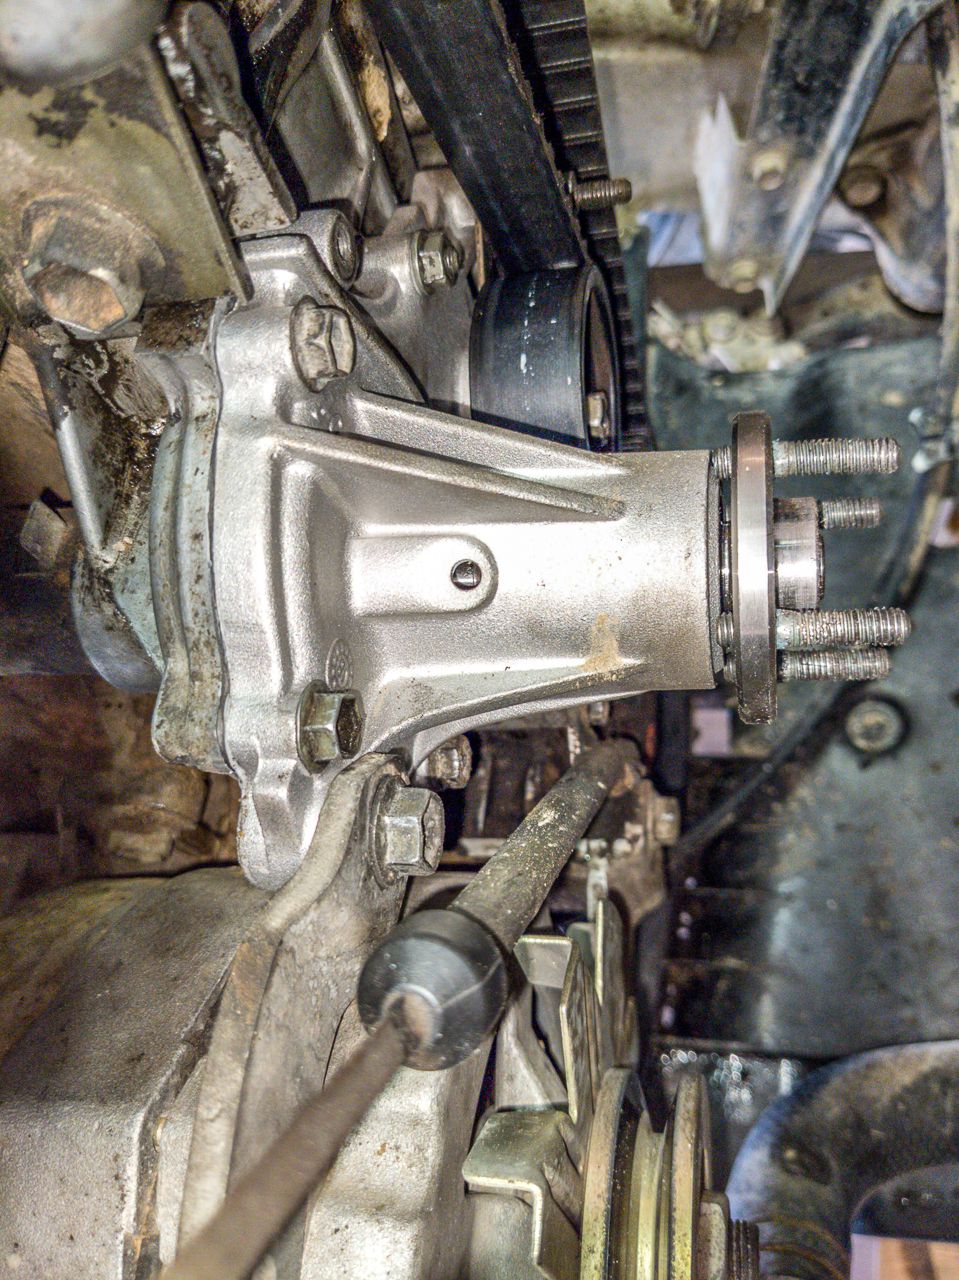
I woke with a start, realizing I'd forgotten to tighten the tensioner stud, the pic below from the service manual is mislabeled but basically it's the stud that's directly above the pushing finger and which seems to be labeled as 1.
In the belief that a loose stud would eventually work itself loose and fall onto the crankshaft timing gear, I started taking things apart yet again after breakfast.
It didn't take me long, the PITA points being once again the nuts holding the fan onto the fan pulley and the bolts securing the alternator. Once I got to the stud in question, I realized its also the stud onto which a nut mounts to secure the center portion of the timing cover! So it probably would not have worked itself loose. Oh well, better to secure it.
In the process, I found one timing cover bolt not tight and figured out an easier way to access the mounting bolt under the alternator. (Use the opposite bolt on the mounting bracket, easier to get to when everything else is mounted).
Now, I know everything is secured and a test drive showed success and still no leakage from the new water pump!
Time will tell, of course, if I did the work properly. A short test drive showed all was well, no leaks and the temperature gauge needle only climbed to halfway between 1/2 and 3/4 before settling back down to the 1/2 mark.
My grateful thanks to the ever patient and helpful RichardM and MikeW (Sammy Guru in NM), I don't know what I'd do without them both.


2 comments:
WOW, what a process. Luckily you were home with access to all the tools when you discovered the problem and not in the middle of an Arizona desert. At least the Mechanical Gods smiled on you with that.
More impotant you had two patron saints watching over your shoulder, helping along the way.
Yep, Patron Saints indeed CCjon.....it would have been a bit harder in the desert I think but no tool was used that I don't carry with me anyways.
Post a Comment