Natasha is now over 25K Km and she was way overdue the servicing of her front shocks. I consulted the goldmine of Ural information at Bill Glaser's myural.com site and assembled my tools. You have to compress the shock absorbers in order to remove the retaining rings that hold everything together under pressure.
The above link shows you the procedure step by step, I shall just write about some of the "highlights" I encountered during my servicing of the front shocks on Natasha.
This is a shot from Bill Glaser's site showing the homemade shock compression tool he made and which I copied:
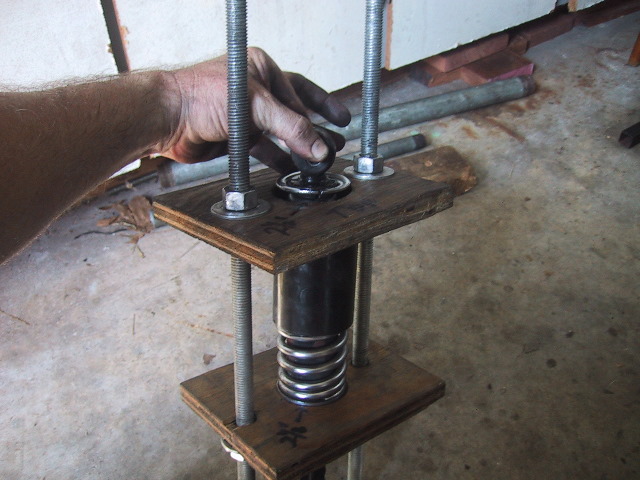
image source: Bill Glaser

I started with the right front shock, here's a view of Natasha's front wheel sans the shock
From Bill Glaser's website: Top view of shock showing the two chrome keepers
which hold the shock inside the bell cover and spring.

Here's a shot of my shock compression tool, after I'd compressed it and removed the shock assembly
from the above spring housing

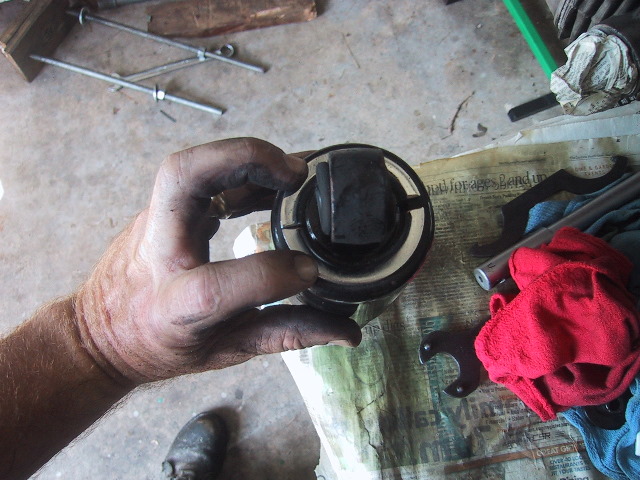
Here's the shock's housing, wiped down clean and secured to a vise so I can remove the cap
holding the shock components within the black shock housing.

Here's the Ural shock tool needed to loosen and spin off the threaded metal cap that secures the shock components inside the oil reservoir which itself is inside the black metal tube
Note: the cap tells me I have the 12mm seal model of the shocks. This is good as its the one in stock at Ural dealers, the 14mm seal is apparently unobtanium here in the west.
While Bill Glaser's site goes into detail on how to further disassemble the shock further if components are damaged, I only had to replace the old oil with new 20W50 Engine Oil. A bit messy until I got the hang of it but really it was just cleaning and replacing of the shock absorbing fluid.

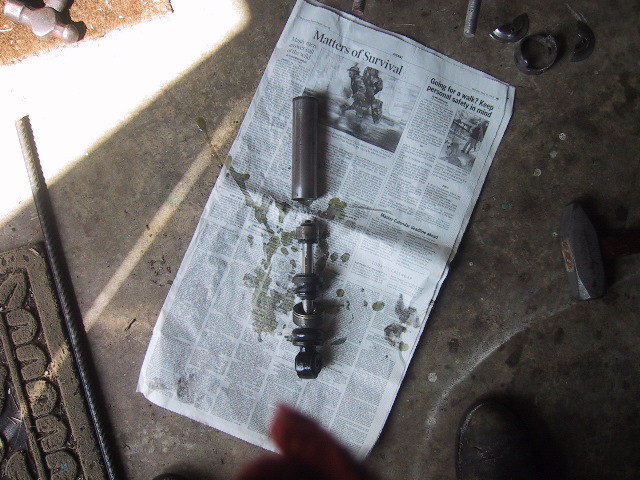
You can see, not much of the old oil was left in the reservoir (light brown tube)
The lower item is the shock itself which fits inside the brown tube.
from Bill Glaser's website: a better view of the shock's piston body free of the oil reservoir

Here's Natasha's left side front shock, after having removed it from the spring cap assembly
note the dirt and grease on it which I would clean off.
The left front shock had some damage to the metal cap on the piston, I'll be ordering a replacement soon I think. Also the shock tensioner appeared to have been damaged before and re-welded, another thing to order for my peace of mind. It did however, have much more old oil remaining in its reservoir than the right side shock!
The first shock took about an hour, the second one took less than 20 minutes as I had the hang of things now. Re-assembly of the shocks was a bit messy as I got used to the new oil spilling out a bit when introducing the shock into the reservoir tube.
Once capped into place, I slid the clean shock housing into the cap and spring assembly, worked the nuts loose on my compression tool and voila, a serviced shock ready for installation onto Natasha.
The original plan had been to only do the front shocks as I was bidding on a pair of barely used shocks on Ebay. I then changed my mind and removed the left rear shock and started working on it! Alas, the motorcycling gods decided I'd push my luck enough for one day. I could not, after much effort, remove the metal cap off that third shock! I stopped before I buggered the cap up and made things worse. It seems to be working fine as is, though not as "strong" as the newly service front shocks.
I put the un-serviced left rear shock back in place, got cleaned up and put away my tools. After lunch, it was a short test ride to make sure nothing fell off Natasha. I have to tell you, the front end suspension is much smoother now when hitting bumps, no more feeling like she's bottoming out and no fighting the handlebars when hitting a bump on a turn! All good stuff.
My continued thanks to Bill Glaser and the wealth of maintenance/servicing information he's compiled and posted freely for the benefit of the Uralisti community.
So, except for the difficulty in removing the cap to the shock, it was a pretty easy maintenance operation. I am going to figure out a way to put a "cheater bar" on the end of the Ural shock wrench to enable me to service the remaining three shock absorbers on Natasha. For now though, we're ready for the rocky trails once again!
1 comment:
That is a pretty ambitious repair. You must be building up a pretty good collection of tools with each repair job. I think being able to do these repair and maintenance items is one of the real benefits of the simpler bikes...
Richard
Post a Comment