Sunday, October 09, 2016

Post-Glamping Notes

Glamping: Glamorous Camping, or really not roughing it.

Martha and I camped with our Jayco Escapade CSLP Motorhome this weekend at the KOA RV Park near Wellington, CO.

The goal was a shakedown ride, use of all systems and see if everything was in working condition as this is a 2006 unit.

I'm happy to report it all went well, though it took me a few tries to figure out the proper way to flush the black water tank!  I thought the gray water tank, upon being drained, flushed the black water tank, it does not.  Doh.

The water level sensors on these holding tanks are notoriously unreliable and I'll have to figure out the right amounts of cleaners/deodorizers to use but otherwise, no issues and more importantly, no messes when I did the flushes at the RV Camp's sewer port conveniently located at our parking spot.

It didn't take Martha long to get comfortable on the J-Steel Sofa.
It pulls out into a twin sized bed, we slept in it together the
first night, with no real issues.

The second night, Martha had the above bed all to herself, and I tried out the queen-sized bed in the overhead compartment.  Quite roomy, though a bit short on headspace.  Quite comfy otherwise.

Martha cooked us a couple of meals and the testing of the restroom facilities went as planned, with everything working as it should.


Sunday morning, we packed everything back up in about 30 minutes or so and headed on home.

We did find, the upgraded sewer hose we bought will not fit in the tube compartment designed to house such things.  The sewer hose that came with the RV will be thrown out, too short and lacking a coupler on one end.

I need to cut some 2x8 boards for use as leveling blocks, even a slight grade can cause some slight issues like pots wanting to slide off when on the stove.

It's really nice to have full hookups when glamping, you don't worry about power usage and don't have to run the generator which is a bit noisy and of course produces fumes when running.  The fresh water tank was 1/3 full when we picked up the RV, but since we had "city water", we didn't use any of it except to make sure the water pump worked.

The RV electrics are powered from a single deep cycle battery!  I was quite surprised, figured there'd be a bank of batteries.  Of course this means either putting another deep cycle in series for more capacity or perhaps solar panels for when boondocking or dry camping.

Cost for the night was $45, not too bad considering the cost of lodging for two these days.  The price is lower in state parks and such I believe.

Sunday morning, leaving the RV Park.
You'll note the TV antenna is stowed and the motorhome is
not trailing power/water/sewer tubes!

The Jayco Escapade (we're still working on a name for her) just fits on the driveway but blocks one of the bays for the garage.  Still, the HOA doesn't permit an RV to be parked more than 72 hours so it's not like it'll block the bay for long.

Chatting with our neighbors about the motorhome

I'll be taking the Escapade over to its storage parking spot on Tuesday, there's some stuff to do like applying fresh sealant on the roop openings, outfitting it with "nice to have" stuff inside, putting in a small TV, trying out the towing of the trailer with URAL sidecar on it.

Looking forward to the next outing!

Friday, October 07, 2016

Extending our Range

Long distance road trips, the siren song of many motorcycle riders.

I've done several rides that spanned multiple days, the one to Alaska and back took 75 days and two engines rebuilds!

I am fortunate, in that I can work from anywhere, so long as I have Internet access.

Motels can be expensive, camping out of one's rig can be fun but the logistics use up space and add weight to the rig.

What to do?  Especially when one wants one's loving wife to come along?

In our case, my loving wife Martha and I have decided to try RV Camping!  Once we're fully setup, we'll tow one of the Ural sidecars in the trailer behind the RV.  Using the RV motor home as base camp, the sidecar rig can be used for supply runs and exploring.  In the long run, I'll trade in the trailer for a longer one perhaps so that Stewie, Martha's scooter can come along as well!

Today, we picked up a 2006 Jayco Escapade in pristine condition for what we considered a reasonable entry price into this new-to-us world of RV camping.  We'll be camping at a KOA campground in Wellington, CO through Sunday and see how things go.

Following pics are from campingworld.com's website:

 2006 Jayco Escapade CSLP
 One slideout, overall length 24.8ft (7.5m)
 Height is just shy of 11 ft (3.35m)
Towing capacity 5000lbs (2268 kg)

Looks pretty good for a 10 year old motorhome doesn't it?  Here's some views of the interior.

 Looking towards rear where the kitchen and bathroom are located

 Sofa folds out, table is bed too (for kids) and there's the overhead bunk area


Some specs: 

Engine:  Ford Triton 6.8 Liter V10 (305 H.P.) - Yeah, we'll be lucky to get 10 MPG.
Chassis: E450 Super Duty

LINK to the sales brochure this particular Jayco RV was sold with:  LINK

More to follow as we see how we do this weekend as RV campers.  The correct tow hitch for my Aluma trailer is on order, I'll be testing towing the trailer with the Escapade next week.  The lessons learned this weekend will drive further work/outfitting of the RV for future trips.

Tuesday, October 04, 2016

Fiery Sunset with Scarlett

Yesterday's sunset was pretty good, as predicted by sunsetwx.com's website.

There were enough clouds to reflect the light from the sun once it had set behind the Front Range mountains.


Pre-Sunset view of Downtown Denver

Monday, October 03, 2016

Scarlett's 40K Km Service

This past week, I completed the 40,000 Kilometer service interval work on Scarlett, my 2014 Ural Patrol Sidecar Rig.

The manual and its service interval checklist only goes up to 30K Kilometers so after consulting Jason of Ural, I treated the 40K interval as the 10K service interval on the checklist.

Found a small hole in the right side compliance fitting, which mates the throttle body to the right cylinder head.  It explains some rough running, intermittent, that Scarlett had experienced in the last few rides: (sorry for the blurry pics)

 Hole in right side compliance fitting.  

I replaced both compliance fittings as per the maintenance checklist.  Kept the left side one as it wasn't damaged yet, to use as a "get me home" spare part.

Replaced both spark plugs, the color on both looked good, apparently caramel color with EFI units is not the standard now; per conversations I've had with Randy, the URAL dealer up at Fort Collins.

 Port side spark plug

 Starboard side spark plug

Valve clearances were checked found the port side intake valve too tight, and the port exhaust valve too loose so adjusted them to .004".  Starboard side valves were spot on.

Checked wheel bearing play on all three wheels, no looseness detected.  Pulled off the wheels to check the splines:

 Sidecar Wheel splines look pretty good!


 The pusher wheel splines and hub splines are not looking as good.
They're starting to wear and look "pointy".

All drive shaft splines were lubed as well as all the u-joints.  Engine and gearbox oils changed along with oil filter.  All three wheels have good amount of brake pad material remaining.  All spokes checked/tightened.

Fuel filter was replaced as well, per the checklist.

Checked the steering head bearings using the "elevate the front wheel" and shake at forks midpoint back and forth, checking for movement" method and it all seems good.

Scarlett's ready for more!

Update: 05OCT16:

Swapped the "Splined Flange" from the spare wheel to the pusher wheel today.  Ural wheels, since 2014 anyways, now come with a field replaceable splined flange.  The component picture below, which mates the wheel hub to the driven hub spline on the final drive.

 Splined Flange of the spare wheel above
Note the new looking teeth with the flat top

 Worn splined flange on the pusher wheel
The pointy appearance causing this swap work.

Removing the six Allen headed bolts proved slightly difficult as they're mounted with blue Loctite at the factory but eventually, I had them all off without causing damage to the bolts.

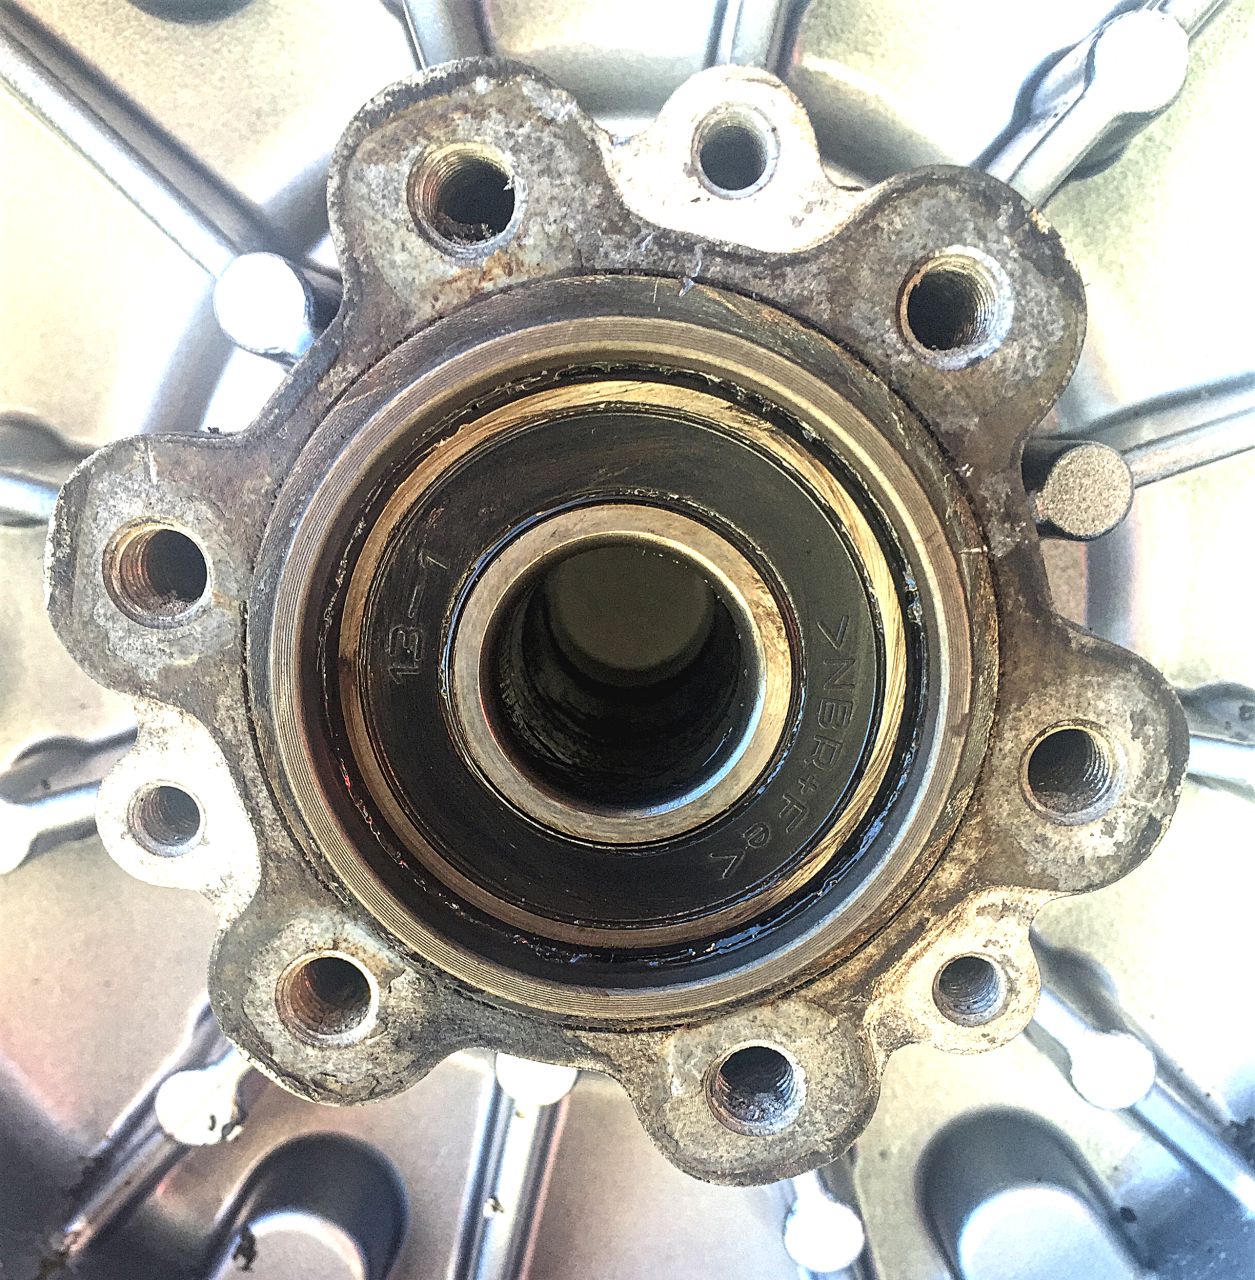
You then remove three smaller Allen head screws and pop off the plastic cover on the hub, revealing the below assembly once you gently pry the flange off with a flat tip screwdriver.


Old grease wiped off, clean new grease applied both to the face of the bearing above and the distance bushing (top hat) and thrust washer:


New condition splined flange, now mounted on the pusher wheel's hub.

Did the same cleaning/re-greasing of the spare wheel's hub and put the worn splined flange on it.  Once I get the new one I have on order from the Ural dealer, I'll do that swap on the spare wheel.

This should, hopefully, slow down the wear on the driven hub splines, forestalling the day I have to take the Final Drive apart to replace that item!