The coupler assembly, which mates the alternator gear to the timing gear at the front of the engine, which in turn is driven by the cam shaft gear was the weak point then. Although the new coupler is better it still one known issue.
The Denso alternators enjoy a newly designed coupler assembly, with something similar to the cush drive rubber blocks on my Suzuki's rear wheel assembly providing some "cushioning". Still a noisy device but its weakness really has been the grease in the two bearings on which the alternator output shaft used by the alternator gear is mounted. At high temperatures, the grease in these bearings tends to liquefy and leak out!
The solution, among the Uralisti community, has been to replace the bearings with bearings which have had Krytox Bearing Grease applied. The Krytox grease just deals with the heat better than whatever grease is in the bearings that Ural bought for use in the coupler.
Trouble is, to get a the bearings, you have to remove the alternator from the engine, unmount the coupler from the alternator, remove the drive shaft, the bearings, replace the bearings with krytox'ed versions, then put it all back together! Note, yeah I suppose you could re-use the old bearings but at $4 each, why not just get new ones and Krytox them?
I rode Valencia, my 2011 Ural Patrol, with Patrick my oldest son over to Darrell's home where he was going to Krytox his wife's rig's alternator coupler and fellow Uralista Nick's coupler which had been dropped off earlier in the week.

Here's Nick's Alternator before disassembly
The gear you see is the alternator gear which mates to the top timing gear

Nuts removed, the coupler is ready to be lifted off the alternator
Hint: Make a red dot mark as above to ensure you put the
coupler back on same as it was. For those sharp-eyed observers
who note the circular plate under the alternator gear
appears off-center; it is....apparently on purpose!

Coupler removed, you can see the alternator's cush-drive
rubber blocks
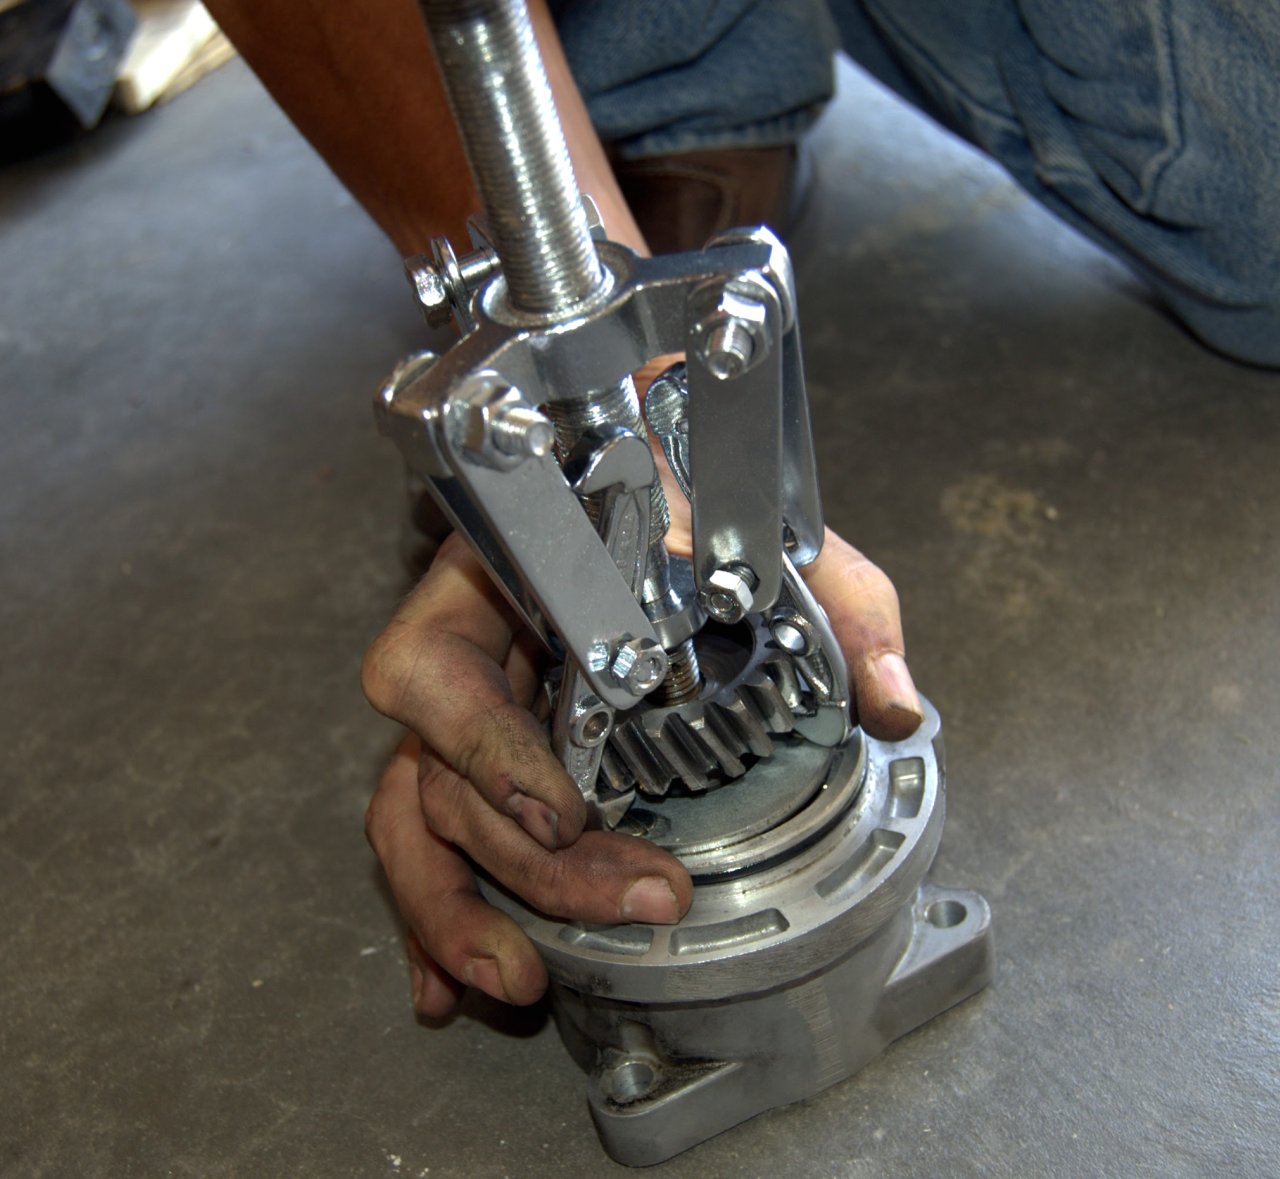
Next, you pull off the alternator gear using a three-pronged gear puller.
The one depicted above proved "inadequate" and we ended up driving
over to AutoZone to borrow a smaller one with thinner jaws.
The borrowed gear puller worked marvelously!

Alternator gear removed, fully exposing the bearing retaining plate
which is secured with RPOC slotted screws.
I hate these cheap pot metal screws, my '96 Ural had plenty of them and I
ended up replacing them all! Not many of them anymore on the new rigs.

I managed to break off one of the slotted screws on Piper's alternator
while unscrewing it from the retainer plate.
Darrell then tried to extract it with a screw extractor and the
screw was in so tight that it broke the tip of the screw extractor!
He'd read this had happened to other Uralisti, and that two screws is enough to
hold this bearing retainer plate, so all was not lost. We used the two unbroken screws, drove over
to Ace Hardware and got stainless steel allen headed screws as replacements.

Bearing plate removed, you can see the first of two bearings to be replaced.
Note all the melted bearing grease on the surface of the coupler.
First though, we had to press out the shaft.

Putting the castle nut back on to provide a strong pushing point,
we put the coupler in a vise and slowly pressed the shaft back into the
coupler's body. Once halfway loose, it was a simple matter of upending the coupler,
sitting it on the vise and tapping the shaft past the second bearing.

This is Nick's alternator drive shaft, note how the melted grease
had sprayed out with the shaft's rotation.
The old bearings, note the spacer between them, this item is key!
Don't lose it and damn sure don't forget to put it back with the new bearings.

Here's one of the two new bearings, which we'd pried the plastic covers off of,
you can see the small beads of fresh Krytox.

The inside of Nick's coupler housing

The coupler housing, cleaned up. Note the crude casting defect?!
Both Piper's and Nick's coupler housings had these.

Putting in the new bearings is pretty simple. Use a rubber mallet to get them
into position and flush with the coupler body first.

The use a flat punch to tap along the edge of the OUTER bearing
race, slowly but surely driving it down till it seats.
Then, put in the spacer, keeping it aligned with an appropriately sized deep socket.
Next comes the second bearing, mounted right on top of the spaced and driven
in the same manner as the first bearing.

Both new bearings in place, remount the bearing retainer place
using the new allen-headed screws with a dash of Blue Loctite to keep
them in place.

We used appropriately sized sockets to push the drive shaft back
through the two new bearings. Ensure you press the shaft assembly
fully into the coupler's housing so it just just sits off the bottom.

Now, press in the alternator gear in the same manner using
more right sized sockets. We pressed things until two threads
showed above the edge of the alternator gear.
We measured a gap on 8.5mm between the bottom of the alternator gear and the coupler housing before disassembly, ended up with 8.3mm when finished. We ended up closer to 8.6mm on Piper's alternator gear, we figured it was close enough in terms of Russian tolerances and the un-calibrated caliper we were using.
We both remounted the coupler onto our respective alternators. Note, due to the small cavity molded onto the coupler's housing, you have to lift the coupler off the base, put the nuts on.....THEN....turn the nuts to tighten them down.
That was it! Two alternator coupler assemblies Krytoxed, only one buggered screw and the satisfaction of knowing we've got the best grease possible in the bearings! The old bearings, though seemingly without much grease in them, had spun smoothly in my hands but I think the new bearings will last a long time for both Piper and Nick.
Nick showed up some time after we'd finished work on the alternators and just in time to see Darrell fire up his wife's rig with the krytoxed alternator. Sounded great! Nick had shown up on his new-to-him KLR 650 motorcycle and will be mounting his alternator once he gets it home in Loveland, CO.
I'll probably be doing Valencia's alternator coupler once she reaches about 20,000 Km or so. Good learning experience! Thanks Darrel for letting me get my hands dirty working on both Piper's and Nick's alternators.
Patrick, who'd been playing video games with Nakari, Darrell's stepson all this time....then rejoined me and we rode off into the sunset and back home with no issues.
A good day of wrenching.
8 comments:
Great step-by-step! At it is always nice to learn under great tutelage on someone else's bike. ;) Just kidding. I understand how it feels to break a screw in hard places. Wonder if it had anything to do with nongreased different metals, and the one just seized.
I almost thought this was in a foreign language...krytox, Denso, Russian Couplers.
Actually it is a foreign language...mechanic speak. Ron uses it all the time (even today as he is out messin' with his bike). I'm not fluent. Don't try to explain it. I'll just look at the pretty pics and ooh and ahh over the cool looking parts. :)
Hi Beemergirl, that slotted screw was made of RPOC pot metal and I now believe was truly stuck, after all it was so tight in there that it broke the hardened steel of the extractor! Neither Darrell nor I had ever seen that happen. Luckily the other two came out OK and they're enough to hold things in place. Thanks for commenting, I no longer dread the time when it is my rigs turn to be krytoxed.
Hi Bluekat, am sure what I did yesterday is old news to Ron...
It's actually not very difficult working on Ural's....just the times when parts don't quite cooperate or you are lacking the proper tool when things get "interesting"
Dom,
The first time I did bearings I was surprised at how... ungraceful the experience is. It involved an oxy torch and a big effin' hammer. I'm surprised that any of them still work once they're put in place. The (even rubber) hammer and vice brought it all back. Ah, good times. Glad to see you've been through a demo of it. Can't imagine doing that on your own the first time would feel... correct.
Brady
Behind Bars
Brady, first time I did u-joints and pressing out of bearings on my own, it was not pretty....and yes a BFH was involved and sockets were ruined to accomplish the task. It gets better with practice and the helpful hints one accumulates along the way.
The u-joints on the newer Urals have grease zerks so no issue there anymore.
The krytoxing operation is simple, just getting parts to come unstuck is the "interesting part", the putting back together can be interesting as well.
Thanks for commenting.
Dear Charlie6 (Dom):
I was astounded by the effort this maintenance project entailed. By coincidence, I had been wondering about the status of the Ural's alternator the other day, and meant to ask you. Then I saw the blog. Now, you say you plan to do this to your alternator at 20,000 miles. How do you know the new Japanese alternator will last 20,000 miles?
The alternator on the BMW K75 was also turned by a shaft, and had a buffered hook-up using similar rubber bushings. They were called "monkey nuts."
Great pictures and step-by-step presentation.
Fondest regards,
Jack/reep
Twisted Roads
Jack,
That's 20k km, not miles. And oh ye of little faith, there's rigs out there with over 100,000km on them. :)
Post a Comment